


Description
JEWELRY WIRE 24 Kara Gold
SPECIFICATION
- Diameter: 0.02" | 0.5mm
- Length: 40" | 1 Meter
- Color: gold
- Package includes: 1pcs
DESCRIPTION
- Perfect wire for beginners or professionals to design and create nail art.
- The crafting wire is made of copper and coated with permanent enamel color for long-lasting and effective use.
- The copper wire is tarnish-resistant. It is ideal artistic wire for nail jewelry creation.
- Soft and thin copper wire easily bends and forms. Let your imagination run wild.
HOW TO DO WIRE NAIL ART
PREPPING THE WIRE
1- Purchase thin copper wire.
- The best wire to use would be jewelry-making wire. Use the thinnest wire you can find.
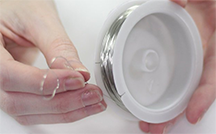
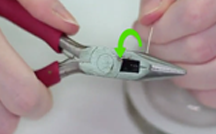
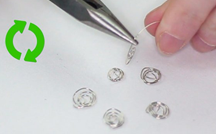
2- Bend the wire into shape using round-nose pliers.
- You can get really creative here. You can bend it to the shape of your nail. You can also bend short pieces to fit your cuticle area or tip for a twist on the French manicure.
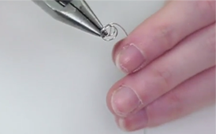
3- Trim the excess wire off using flush wire cutters. Flush wire cutters have a flat side and a concave side. Make sure that you are cutting with the flat side of the cutters facing your design. This will give you a nice, smooth edge.
- Having a smooth edge is important. If it's not smooth then your design can get caught on your clothing and hair.
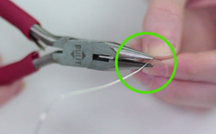
4- Trim the jagged end off of the spool before making your next design.
- The tip of the rest of the wire will now have a jagged edge. This needs to go. Cut the tip of the wire off with your flush wire cutters. Make sure that the flat side of the wire cutters is facing the spool. Discard the stub, and bend the wire into your next desired shape.
5- Keep making shapes until you are done. You can make a new shape for each nail, or you can make a shape for accent nails (i.e. the ring finger). Remember to trim both ends of your wire design so that the ends of the wire are smooth.
- Consider cutting and making squiggles to fill in the negative spaces in your manicure.
PREPPING YOUR NAILS
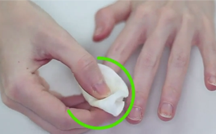
1- Remove any previous nail polish using nail polish remover.
- Wash your hands with soap and water afterwards, then dry them off. This will give you a nice, blank canvas to work on.
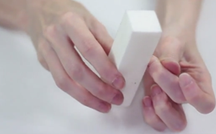
2- Prep your nails.
- Trim, file, and buff your nails to a shape that you like. Push back your cuticles, then apply some cuticle oil or moisturizer.
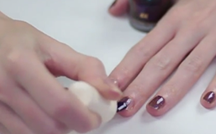
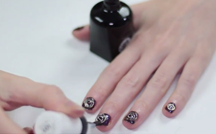
3- Wipe the nails clean with rubbing alcohol or nail polish remover.
- Dip a Q-tip into some rubbing alcohol or nail polish remover. Brush it over your nails to remove any traces of oil or moisturizer. It is important that you do this, or the polish may not stick.

APPLYING THE WIRE
1- Paint your nails with a base coat.
- This is a must, even if you plan on using clear polish for a bare effect. It will help the polish stick to your nails longer and protect your nails against stains.

2- Apply two coats of your desired nail polish, and let it dry.
- You can use a clear nail polish or a colored one. For an interesting effect, consider using matte nail polish in black or white. This will contrast against the shine of the wire and give you a nice effect.
- For best results, use gel polish.
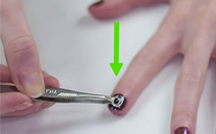
3- Press the wires into the wet nail polish.
- Use a pair of tweezers to pick up the wires. Place them lightly over the wet nail polish. Try to get the placement right the first time.
- If you need to, nudge them into place with the tip of your tweezers. Once you are happy with the placement, lightly press the wires into the polish with the tweezers.
5- Apply a clear top coat.
- Make sure that it is glossy so as not to dull the wire.
- If you used matte nail polish, however, you might want to skip this step.
- Using matte top coat would only dull the wire, and using regular top coat would take the matte-ness away!
- If you used gel polish, then you will need to set it under a UV light.
PLEASE NOTE:
- The colors on the website are designed to come as close to the true color of the polish as possible. Because of monitor settings, we can’t guarantee an exact color match.
- These colors are made to be a representation of the true color


Related Products
Related Products


JEWELRY WIRE 18 Kara Gold 0.02" Diameter x 40" Length

JEWELRY WIRE Bright Gold 0.02" Diameter x 40" Length


JEWELRY WIRE Rose Gold 0.02" Diameter x 40" Length


JEWELRY WIRE Red 0.02" Diameter x 40" Length

